Procreate is a powerful digital art tool that offers a plethora of features and capabilities to create stunning artwork. We already explored how to install Procreate Brushes and how to create color palettes in Procreate. In this tutorial, we'll explore 7 Procreate tips and tricks that you may not know about, to help you improve your digital art skills.
1. The Power of Quickline
Quickline is a nifty feature that allows you to create perfectly straight lines with ease. To use Quickline, simply draw a line and hold the pencil or brush down at the end of the line. Procreate will automatically straighten the line for you.
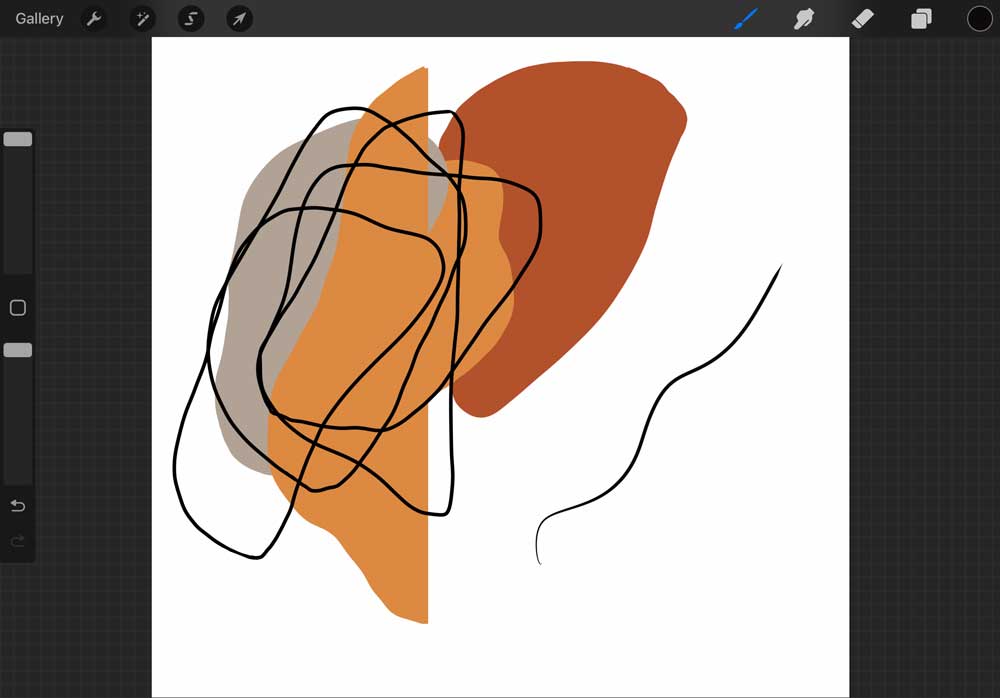
Do not release the pencil at this point, hold it down and the line will straighten automatically:
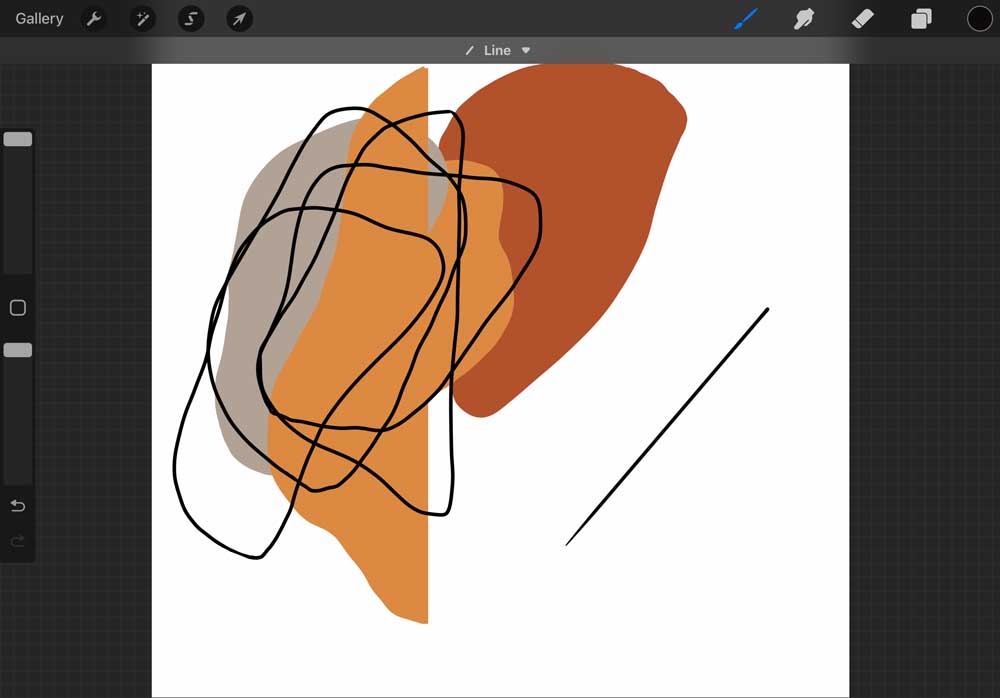
Voilà! You have a perfect straight line!
2. The Magic of Clipping Masks
Clipping masks are a powerful tool that allows you to apply effects or adjustments to a specific layer without affecting the layers below. To use a clipping mask, simply tap the layer you want to apply the effect to, select "Clipping Mask," and choose the layer you want to clip to.
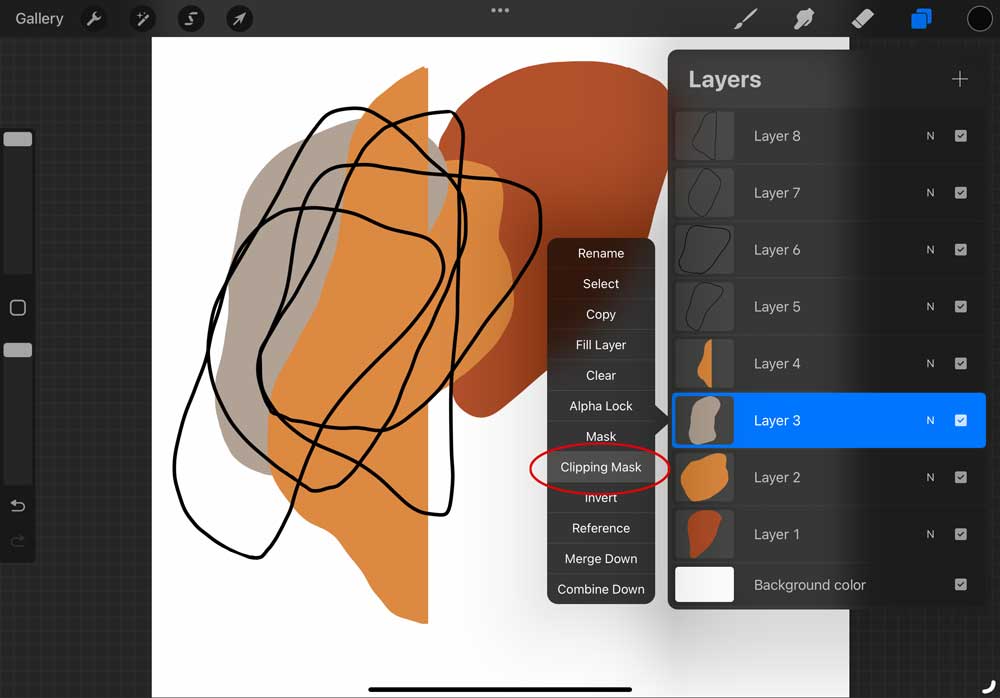
Once you've tapped on "Clipping Mask" this is how it looks:

Now you can draw on the clipped layer without accessing the others you'll never go over the edges!
3. Use Gestures for Quick Access
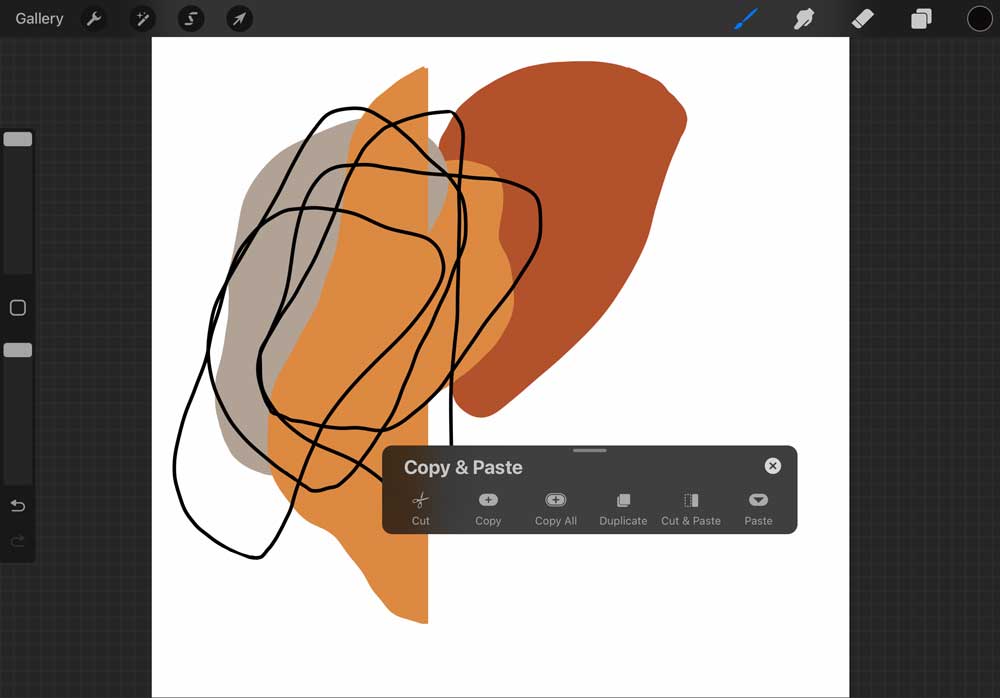
Procreate offers a variety of gestures to help you quickly access commonly used tools and features. For example, double-tapping with two fingers will undo your last action, while tapping with three fingers will redo it.
If you use three fingers from top to bottom an entire menu comes up to copy, cut, paste and more.
4. Explore the Layer Options
Procreate offers a range of layer options to help you organize and manipulate your artwork. For example, you can group layers together, lock layers to prevent accidental changes, or use alpha lock to apply adjustments or effects to specific areas of a layer.
Beside that you can of course rename layers and move them from one group into the other.
Swipe each layer to the right to mark them all, then type "Group" in the top right corner to put them all into one group:
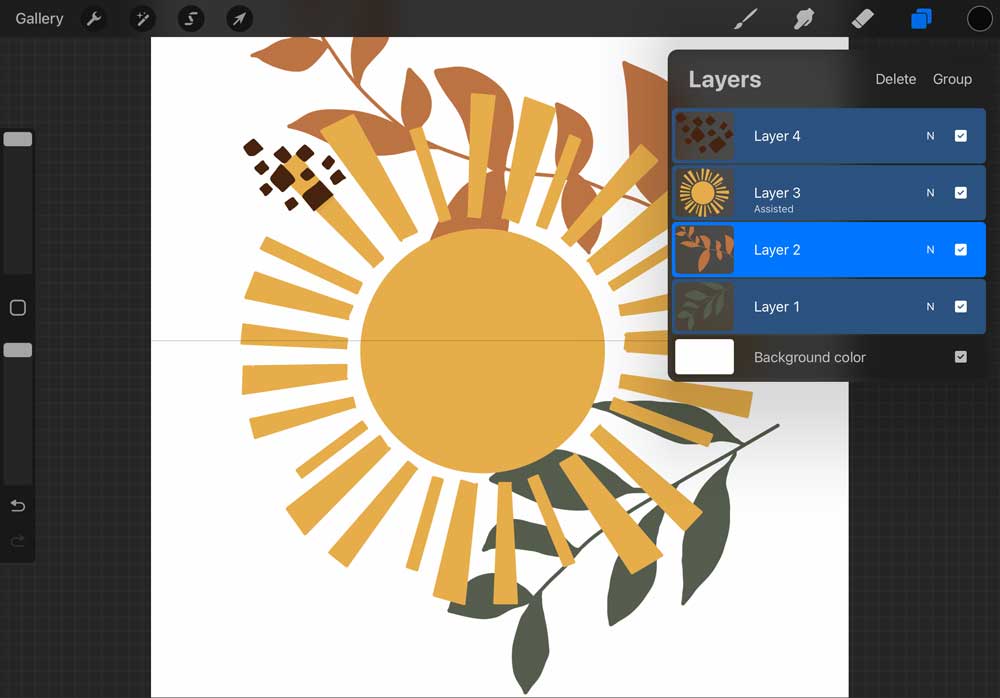
Now you can rename the group and flatten it:
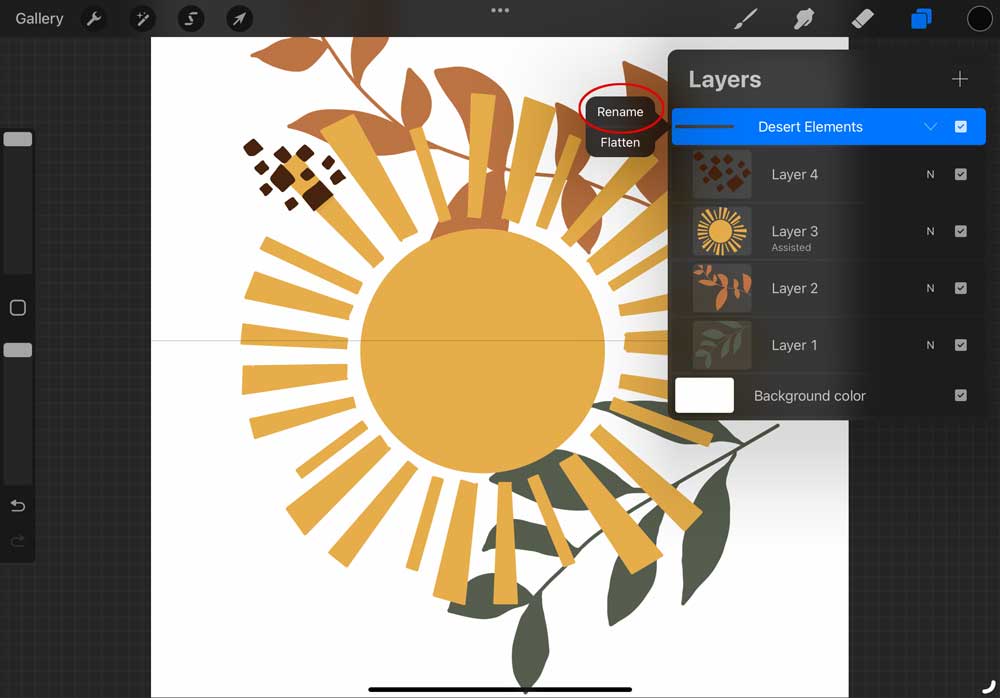
5. Experiment with Brush Settings
Procreate offers a variety of brush settings that allow you to customize the behavior and appearance of your brushes. For example, you can adjust the brush opacity, size, texture, or blend mode to achieve different effects or you can create entirely new brushes (and sell them as digital products!)
6. Take Advantage of the Color Panel
The color panel in Procreate offers a range of color options to help you find the perfect shade for your artwork. You can also use the eyedropper tool to select colors from your artwork or import color palettes from other sources.
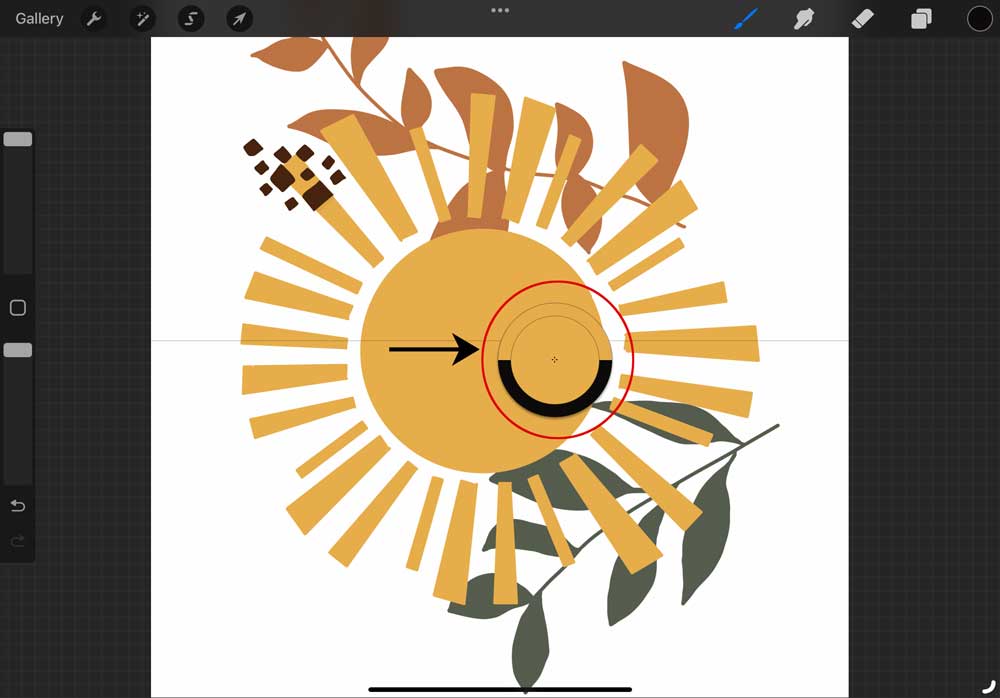
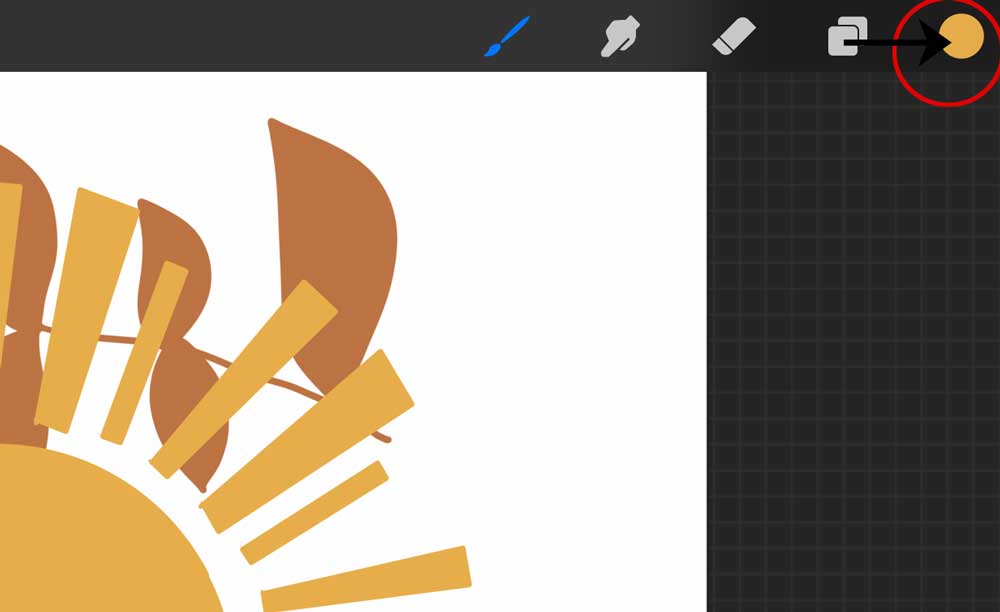
To use the eyedropper tool just tap anywhere on your artwork or a picture and you'll pick the color. It appears on top right in your color panel and you can also save it.
Beside that you can go to the color panel and take a picture Procreate should pick colors from or choose one from your camera roll.
Type with your finger on the color you want to pick and you see that it turns into this circle:
When you release your finger the color is in the top right corner:
7. Utilize Time-lapse Recording
Procreate offers a time-lapse recording feature that allows you to capture your entire artwork creation process as a video. This can be a great way to share your process with others on Instagram and gain popularity!
By incorporating these 7 Procreate tips and tricks into your workflow, you can streamline your digital art process and create even more stunning artwork. Whether you're a beginner or a seasoned Procreate user, there's always more to explore and learn within this powerful digital art tool.
