Bevor we dive into vectorizing Procreate Artwork we need to talk about the main differences between Procreate and any Vector based program such as Affinity Designer or Adobe Illustrator.
Procreate, a pixel-based Program
In Procreate all artwork you create is pixel-based. That means that your artwork is made up of tiny squares, aka pixels. You can see them when you really zoom into a picture or simply increase its size. Please see below how these pixels look. I have the picture with the flamingo in high resolution
Have a look at the image with the flamingo. I just cut it out from a high resolution image. So right now you cannot see the pixels.
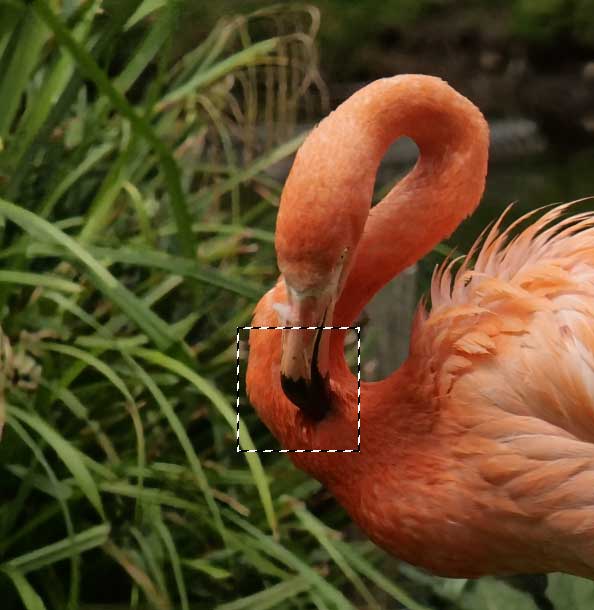
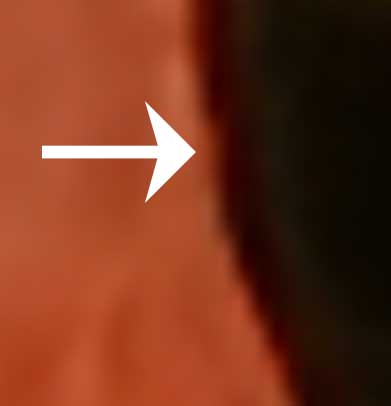
But here is a cutout of the flamingo image. I zoomed in and selected a small area and increased it. Here you can see the pixels. The same happens when you draw something in Procreate and you need it in a larger size. Whenever you increase the size of your drawing it gets pixelated.
When you could get even closer to where the arrow is you'd see something like a stair - consisting of pixels. Please see the image on the right.
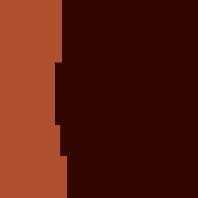
The resolution of your image is the number of pixels that can fit within a certain size (ppi = pixel per inch). The standard print resolution is 300 and something you should always choose when you create a new document. This is important because the higher the resolution the crisper the image, but with 300 you are always good to go.
Most probably you have seen dpi more often than ppi. It can be used interchangeably. Dpi are dots per inch. It refers to artwork that has already been printed. On the other hand Procreate's interface as well as Photoshop and other programs note resolution as dpi because it's on screen resolution.
Pixels vs. Points
On the other hand vectors consist of little dots rather than squares and no matter how much you increase them they'll stay little dots (you cannot really see). That actually is the main difference between pixel and vector based images. Vector based images can be scaled infinite. If you'd create your original, pixel-based artwork the largest it would ever be used at with a 300 ppi resolution you'll always be fine. There wouldn't be a need to vectorize your image.
Beside that vector images always have a more flat style.
So why convert Procreate Artwork into Vector images?
There are some reasons why you need it:
1. You need your artwork larger than planned and don't want or cannot remake it. You should never enlarge your pixel-based artwork because stretched pixel will turn into blurry images (see above).
2. A client asks you for a vector image
3. You want to turn it into a logo and logos always need to be vector images because you never know where a vector ends up.
How to vectorize your Artwork in Illustrator
I know there are workarounds using Adobe Illustrator and I wish here would be one as well. But I want to respect your time so I show you the process in a tool where I know it works.
We will start by exporting the layered artwork (whatever you have drawn) from Procreate to your computer. To do so click on the little wrench icon, then share and then under "Share Layers" on PNG Files.
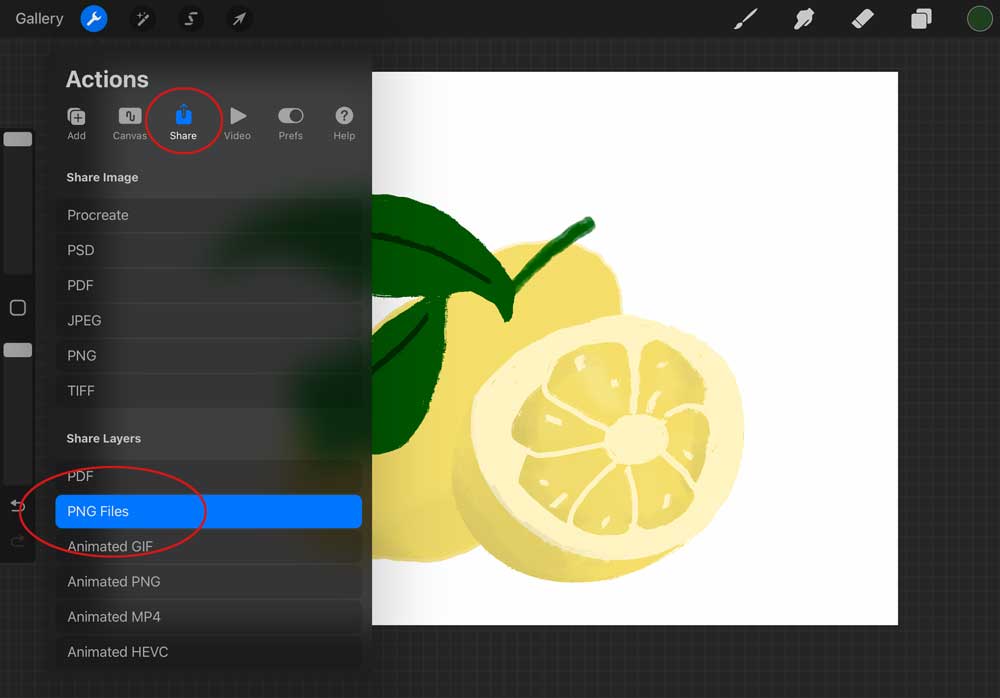
Air Drop them to your computer or send them by email if you are on a Windows computer. Whatever you choose it should look something like this:

Create a new document with 3000x3000 px and 300 dpi. I choose 3000 px because the single elements are around 2400 px so I wanted it a bit bigger. Now drag and drop all the images into your document. It now looks as if you have just one piece added but actually they are all there when you look into the layer palette.
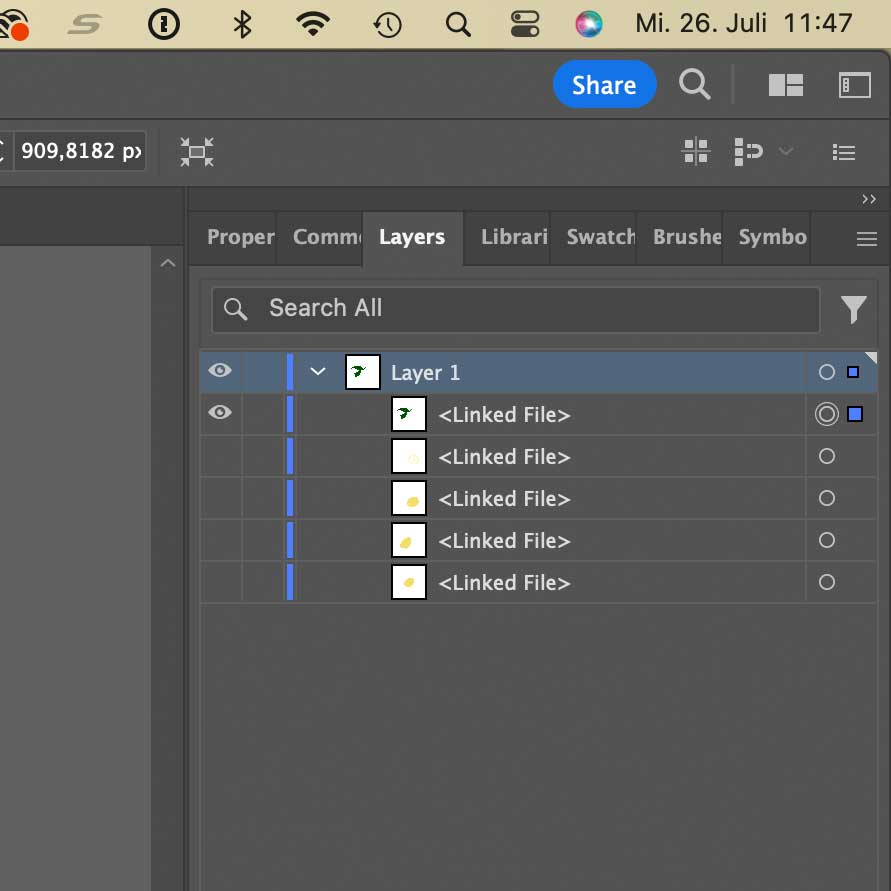
If you cannot see the layer's palette go to Window --> Layer. When you now click on the little arrow you can see all the layers.
Now it's time to start tracing!
Again, make sure your image trace panel is open. If it isn't go to Window --> Image Trace.
Mark the first layer of your image in the layer's palette, then open image trace. Now we need to fix a few settings.
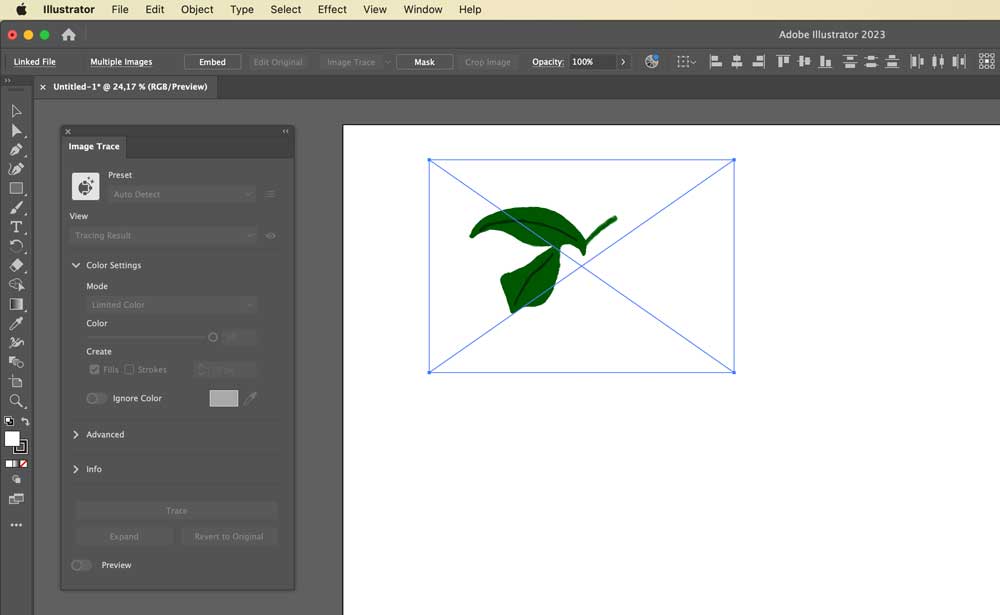
Choose as preset "6 Colors" if your image has no more than 6 colors. Actually in this example I reduce the colors to 3 - I have green, black for the veins and white. And then I click on "Ignore color" which is set to white.
If you have rough edges you can click on "advanced" and reduce the paths and noise. As long as you have turned preview on you can see the result on your document.
Beside that you can save the preset next to the image where it says "6 colors".
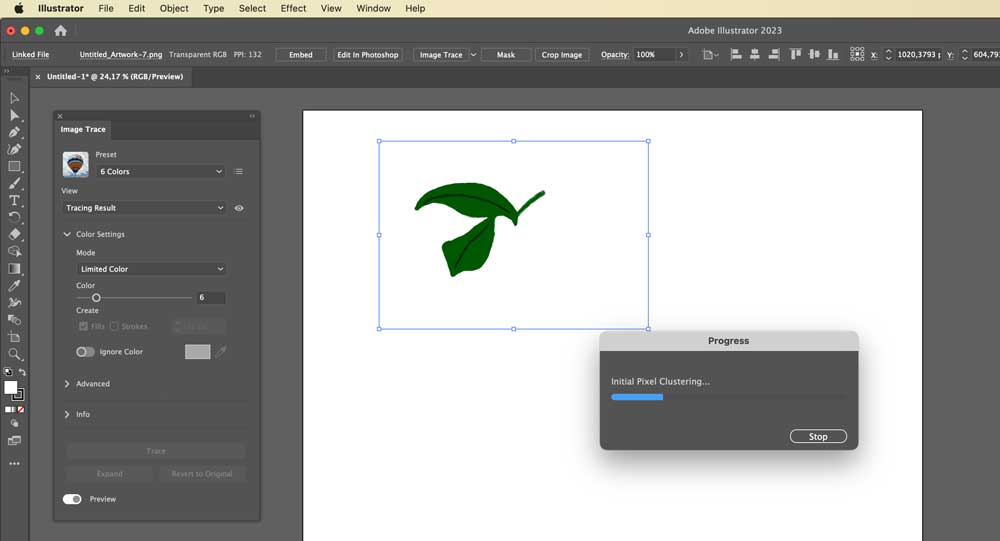
Once you have saved the preset you can apply the exact same settings to each layer. Turn the layer with the leave off and the next one on and then apply the exact same settings there. Sure you can always change the settings even if you use your preset.
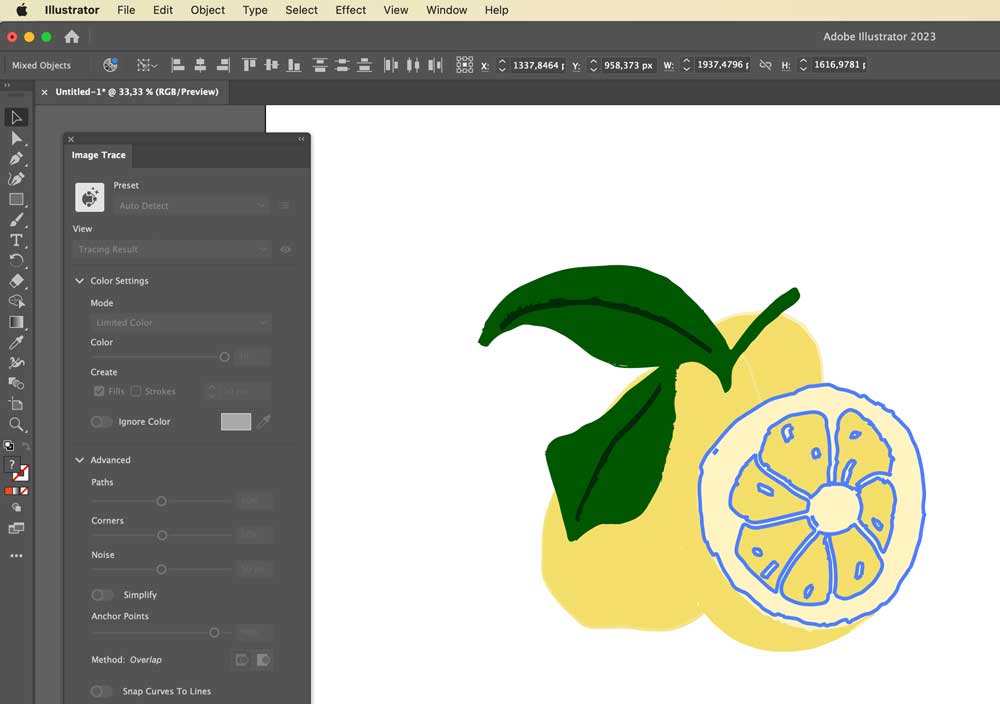
Now you can turn on your pieces and you have the entire image traced.
You don't have to subscribe to Adobe Illustrator immediately. You can download the program for a 30 days free trial and check it out.
I know Illustrator is a beast and not that easy to use but once you've mastered the image trace you can also easily change the color of the elements and increase the size.
As always it depends what you want to sell. But if you e.g. want to sell clipart and draw them in Procreate it's a great choice to also add a vector version to your package by tracing the elements in Adobe Illustrator. It will give your customers more value with each package they purchase from you.
Not (yet) familiar with Procreate?
Join me in this free class!
Procreate for iPad Beginner Class
Join me in the Procreate Class and learn everything you need to know for creating your artwork in Procreate.
